updated 2/14/23
Use the Site-Specific History Item feature to collect customized student, staff, or volunteer history details.
- Video: Site-Specific History (4:41)
- Related: Display/Hide Goal - Credential Earned
Note: custom history items cannot be added to basic history groups. For example, you cannot add the custom item "WIC" to the Public Assistance group.
Custom groups and items:
- can only be added by people with admin account privileges
- appear on the traditional SiD Add Student/Staff/Volunteer intake screens. They do not appear on the generic E_intake registration form.
- apply to the entire site
Once created, custom groups and items
- can be viewed on the History subtab menus, but ONLY by the site that created the group/item
- may be applied to new students/staff/volunteers on the electronic intake screen
- may be added to an existing record as a new row on the history screen
- appear as menu items on the Student History Items report
Add a new History Group and Item
- On the Admin tab, click the Site-Specific History Items link.
-
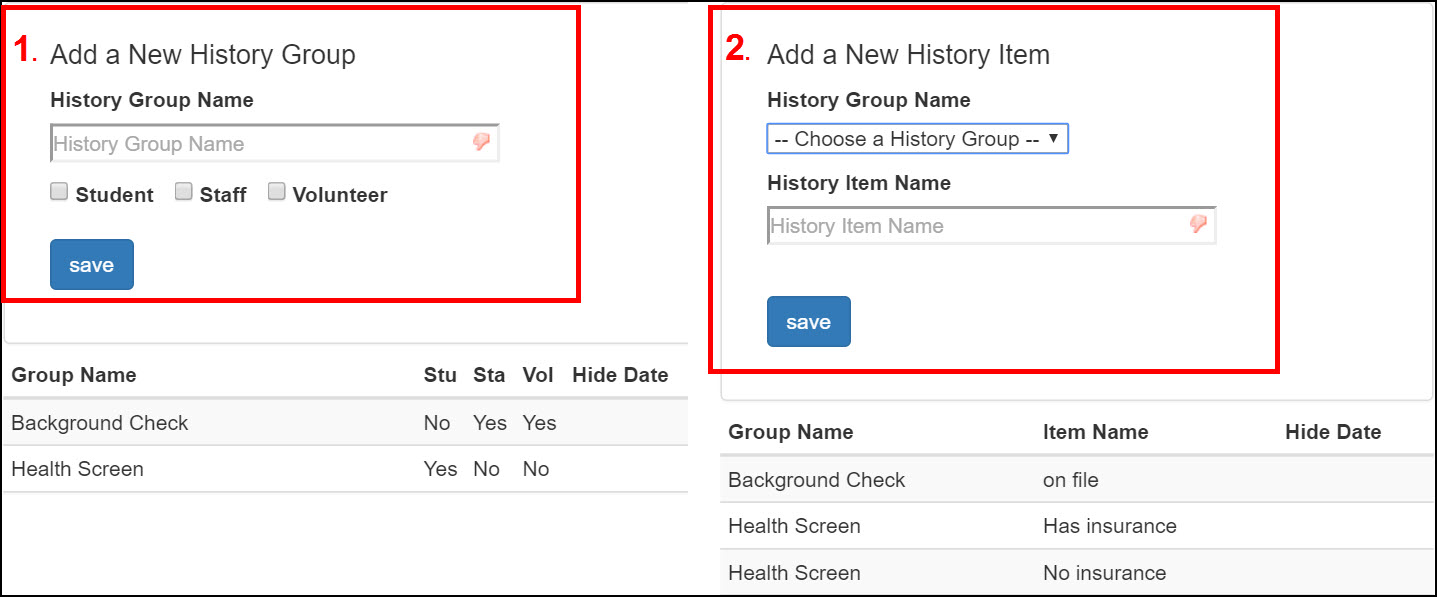
Create a new History Group:
- Type the desired group name in the History Group Name box.
- Select the people - student, staff, and/or volunteer - the History group applies to.
- Click the Save button. The new group item will appear in the list below the form.
-
Create a new History Item:
- In the Add a New History Item form, choose the name of the desired History Group.
- Type the item name in the box.
- Click the Save button. The new history item will appear in the list below the form.
-
Check the results on the appropriate Add New student/staff/volunteer screen.
- Example: for History Groups that apply to students, click the Person Search tab.
-
Click the New Student button.
-
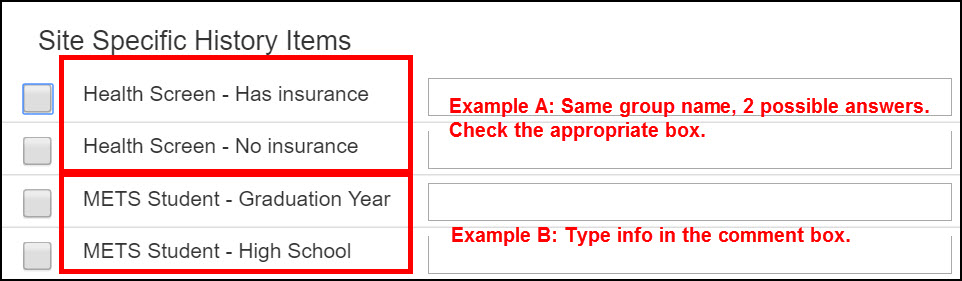
Scroll to the bottom of the page to view the new addition.
- When done checking the custom history item, click Cancel.
When you select a custom item from the Add New screen, it will automatically add a history row to the Students/Staff/Volunteers>History screen.
Edit a History Group or Item
- On the Admin tab, click the Site Specific History Items link.
- Select the row with the group name or group name/item name to edit.
-
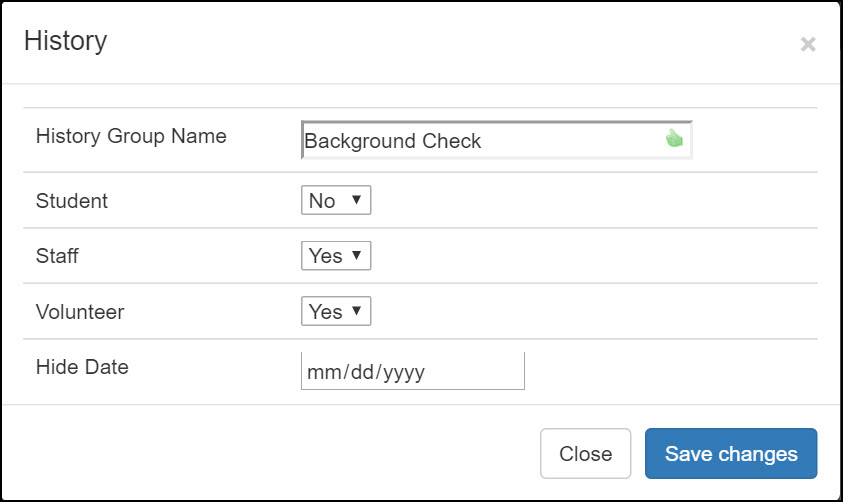
On the History edit screen, make desired changes, then click Save Changes.
Hide a History Group or Item
You can choose to add a Hide Date to a history group or item. The hide date tells SID not to show this item in the history group/item menus after the date you specify.
- On the Admin tab, click the Site Specific History Items link.
-
Select the row with the group name or group name/item name to edit.
-
On the History edit screen, add the hide date. Use a date before today if you to remove it immediately from the menu.
• If you're hiding a GROUP, toggle the Student, Staff, and Volunteer options to "no." Also, give hide dates to all associated history items on the right side of the screen. - Click the Save Changes button.
Note: When a student, staff, or volunteer has an existing history item, the group name will not be hidden from the menu. That will allow you to find and select students with that history group in the future.
0 Comments